Noticing that your swimming pool is losing water specifically when the filtration system is running points to potential issues within your pool’s plumbing or equipment. This common problem can lead to increased water bills, chemical imbalances, and equipment damage if left unaddressed. Water loss during filtration typically indicates a pressure-side leak, suction-side leak, or equipment malfunction rather than simple evaporation or a shell leak. Understanding the underlying causes and implementing appropriate solutions can save pool owners significant time and money while ensuring their pool remains in optimal condition.
When a pool loses water specifically during filtration cycles, the issue is almost always related to the circulation system. The most frequent culprits include damaged O-rings, cracked valve fittings, leaking pump seals, and compromised plumbing connections. Pressure-side leaks occur after water passes through the pump, while suction-side leaks happen before water enters the pump.
Underground plumbing leaks are particularly problematic as they can go undetected for extended periods. The multiport valve on your filter system is another common leak source, especially when O-rings wear out or the valve develops cracks. Even a small leak can result in substantial water loss over time, with some pools losing hundreds of gallons weekly.
| Leak Location | Signs | Typical Water Loss |
|---|---|---|
| Pump Seal | Water pooling under pump | 1-3 inches per day |
| Filter Tank | Water around filter base | 0.5-2 inches per day |
| Underground Plumbing | Wet spots in yard, settling soil | 2-4 inches per day |
| Multiport Valve | Water leaking from valve body | 1-2 inches per day |
Content Navigation
Confirming a Filtration System Leak
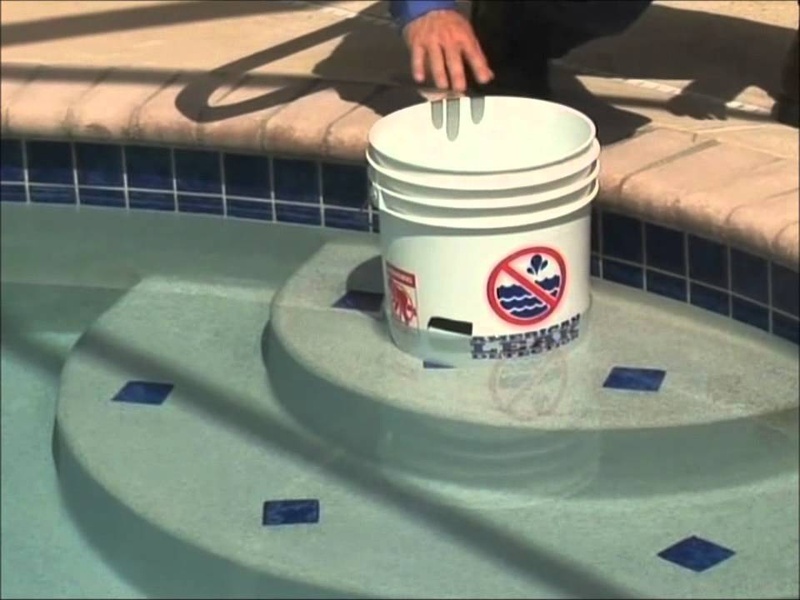
Before investigating specific components, confirm that water loss is indeed tied to filtration operation. The bucket test is the most reliable method for determining whether your pool is losing water due to a leak rather than evaporation. This test involves comparing water loss in the pool with water loss in a bucket of pool water placed on a pool step.
To perform this test effectively:
- Fill a bucket with pool water to about 1 inch from the top
- Place the bucket on a pool step so it’s partially submerged
- Mark the water level inside the bucket and the pool water level outside the bucket
- Run the test twice – once with the filter running and once with it off
- Compare water loss after 24 hours in each scenario
If significantly more water disappears from the pool when the filter is running compared to when it’s off, this confirms a filtration system leak. A difference of more than ¼ inch between the two tests strongly indicates a problem in your circulation system rather than in the pool shell or due to environmental factors.
Call 888-896-7031 for Free Local HVAC Quotes – Compare and Save Today!
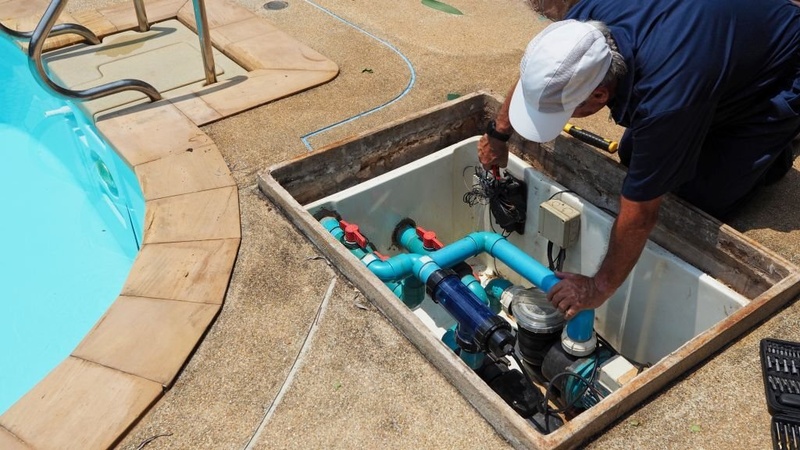
Inspecting the Filtration Equipment
Pump and Motor Inspection
Begin your investigation at the pump, which is often the primary source of filtration-related leaks. Check for water accumulation beneath the pump, especially around the shaft seal where the motor connects to the impeller housing. Pump seals typically last 1-3 years before requiring replacement, depending on usage and maintenance.
Inspect the pump lid O-ring for cracks, flattening, or brittleness. This inexpensive rubber component often fails and is easily replaced. Examine all threaded connections entering and exiting the pump, including union fittings which may need new O-rings or proper tightening.
Filter System Examination
Different filter types have specific potential leak points. Sand filters commonly leak from their multiport valves, while cartridge and DE filters may leak from their tank bands, pressure gauges, or air relief valves. Check all components while the system is both off and running, as some leaks only appear under pressure.
- Sand filters: Check spider gasket, valve stem, and sight glass
- Cartridge filters: Inspect tank O-ring, air relief valve, and pressure gauge
- DE filters: Examine manifold, grids for tears, and tank band assembly
Pay special attention to the filter tank’s drain plug, as these often leak due to missing O-rings or improper seating. For multiport valves, verify the handle operates smoothly without resistance, as internal damage can cause both leakage and improper filtration.
Diagnosing Pressure-Side Leaks
Pressure-side leaks occur in plumbing after water passes through the pump, where pressure is highest. These leaks typically spray or stream water visibly when the system is running, making them somewhat easier to detect than suction-side leaks. Common pressure-side leak locations include:
Return jet fittings often develop leaks where they connect to the pool wall. Inspect these areas for wetness or water spraying when the system runs. Heaters and salt chlorine generators installed on the pressure side can develop leaks at their connection points, especially after several seasons of use.
Call 888-896-7031 for Free Local HVAC Quotes – Compare and Save Today!
For underground pressure lines, watch for unusually lush grass patches, soft soil, or water puddles along the approximate pipe routes. Pressure-side leaks waste both water and chemicals, while potentially undermining hardscape around your pool through soil erosion.
Using Dye Testing for Pressure Leaks
For suspected pressure-side leaks that aren’t immediately visible, dye testing can be effective:
- Obtain food coloring or a specialized pool leak detection dye
- Turn the filtration system off momentarily
- Squeeze a small amount of dye near suspected leak areas
- Watch carefully to see if the dye gets pulled into a crack or fitting
- Repeat with the system running to check pressure-side movement
This method works best for visible components. For underground leaks, professional leak detection using specialized acoustic equipment may be necessary.
Addressing Suction-Side Leaks
Suction-side leaks occur before water reaches the pump, including skimmers, main drains, and their associated plumbing. These leaks are particularly problematic as they can allow air into the system, causing the pump to lose prime and potentially damaging equipment. Warning signs include:
- Bubbles returning to the pool through return jets
- Pump basket not staying full of water
- Pump making gurgling noises
- Difficulty maintaining proper filtration pressure
Skimmer leaks commonly occur at the skimmer throat where it attaches to the pool wall or at the skimmer’s plumbing connections. Inspect these areas for cracks, separation, or deteriorating gaskets. Main drain leaks are more challenging to identify but often manifest as air in the system when the main drain valve is open.
| Suction-Side Component | Common Leak Points | Repair Difficulty |
|---|---|---|
| Skimmer | Throat seal, cracked housing | Moderate |
| Main Drain | Plumbing connection, drain cover | High |
| Suction Lines | Underground pipe cracks, fittings | High |
| Valve Fittings | O-rings, valve bodies | Low to Moderate |
DIY Repairs vs. Professional Help

Some filtration system leaks can be addressed by homeowners with basic tools and parts. Simple repairs like replacing O-rings, tightening fittings, or applying thread sealant to connections are within most pool owners’ capabilities. Hardware and pool supply stores typically stock common replacement parts.
However, certain situations warrant professional intervention:
- Underground plumbing leaks requiring excavation
- Complex equipment repairs involving internal components
- Persistent leaks that DIY methods don’t resolve
- Leaks in heaters or other specialized equipment
Professional pool leak detection services employ specialized tools such as electronic listening devices, pressure testing equipment, and camera inspection systems to locate elusive leaks. Though professional repairs typically cost between $150-$500, this investment often saves money compared to ongoing water loss and potential structural damage.
Preventative Maintenance Tips
Regular maintenance can help prevent many filtration-related leaks before they start. Implementing a consistent inspection routine and properly winterizing your system can significantly extend the life of your pool equipment. Key preventative practices include:
Inspect visible plumbing connections monthly for signs of wetness or corrosion. Lubricate O-rings and gaskets with appropriate pool lubricant annually. Maintain proper chemical balance to prevent corrosion of metal components and deterioration of rubber seals.
When shutting down your pool for extended periods, proper winterization is crucial. Properly draining equipment, adding antifreeze when necessary, and loosening appropriate fittings prevents freeze damage that often leads to spring leaks. Covering exposed equipment protects it from UV damage that can crack plastic components over time.
Monitoring water loss regularly using a simple water level marker allows early detection of developing issues before they become major problems. Addressing small leaks promptly prevents them from expanding into more serious and costly repairs.
Tips for Getting the Best HVAC Prices
- Prioritize Quality Over Cost
The most critical factor in any HVAC project is the quality of the installation. Don’t compromise on contractor expertise just to save money. - Check for Rebates
Always research current rebates and incentives — they can significantly reduce your overall cost. - Compare Multiple Quotes
Request at least three estimates before making your choice. You can click here to get three free quotes from local professionals. These quotes include available rebates and tax credits and automatically exclude unqualified contractors. - Negotiate Smartly
Once you've chosen a contractor, use the proven strategies from our guide — How Homeowners Can Negotiate with HVAC Dealers — to get the best possible final price.