
Installing a new refrigerator water filter often results in temporarily cloudy water, causing concern for many homeowners. This cloudiness typically occurs because new filters contain trapped air bubbles, loose carbon particles, or are simply adjusting to your water supply. While alarming at first sight, this phenomenon is usually completely normal and resolves itself within a few days or after dispensing several gallons of water. Understanding the causes and solutions for cloudy water can help you determine when it’s merely an adjustment period versus when there might be a legitimate issue to address.
The cloudy appearance in water after installing a new refrigerator filter typically stems from several common sources. Each has different characteristics and timeframes for resolution:
- Trapped air bubbles: During installation, air gets trapped within the filter media. These microscopic bubbles create a milky or cloudy appearance when dispensed. If this is the cause, the cloudiness will clear from bottom to top when left in a glass, often within minutes.
- Carbon fines: Most refrigerator filters contain activated carbon. New filters may release tiny carbon particles (known as “fines”) during initial use, creating a grayish tint or visible specks in the water.
- Mineral precipitation: New filters can alter the water’s pH balance or mineral composition temporarily, causing dissolved minerals to become visible.
- Filter media settling: The filtering materials need time to properly settle and compact after installation, which may allow small particles to pass through initially.
Content Navigation
Is Cloudy Water From New Filters Safe to Drink?

In most cases, the cloudiness from a new refrigerator filter is completely harmless. The trapped air bubbles pose no health risks whatsoever. Carbon particles, while unappealing, are non-toxic and generally considered safe in small amounts.
However, if the water has a strong unpleasant odor, tastes significantly different, or contains visible colored particles (not just carbon black), it may indicate a problem with the filter or water supply. In rare cases, extreme cloudiness that doesn’t improve could suggest a damaged filter or contamination issue.
| Cloudiness Type | Appearance | Safety Concern | Resolution Time |
|---|---|---|---|
| Air Bubbles | Milky, clears from bottom up | No concern | Minutes to hours |
| Carbon Fines | Gray/black specks or tint | Minimal concern | 1-3 gallons of flushing |
| Mineral Precipitation | Whitish haze that doesn’t clear | Generally safe | 1-2 days |
| Bacterial Contamination | Cloudy with odor | High concern | Won’t resolve without action |
How Long Does Cloudy Water Last After Installing a New Filter?
The duration of cloudy water varies depending on the cause and how frequently you use your refrigerator’s water dispenser. In most cases, cloudiness will resolve within 1-3 days of normal use. For households that use the water dispenser frequently, the issue may clear up within 24 hours.
Air bubbles typically clear the fastest, often disappearing after dispensing just 2-3 gallons of water. Carbon fines may take longer, requiring you to dispense 3-5 gallons before the water runs completely clear. If using the refrigerator’s ice maker, expect the first few batches of ice to appear cloudy as well.
Call 888-896-7031 for Free Local HVAC Quotes – Compare and Save Today!
If cloudiness persists for more than a week of regular use, this may indicate either a defective filter or a more significant issue with your water supply or refrigerator water system.
Expected Timeline for Clearing
- Light cloudiness (air bubbles): 1-2 gallons or 12-24 hours
- Moderate cloudiness (carbon fines): 3-5 gallons or 1-3 days
- Heavy cloudiness (combination issues): Up to 7 days of regular use
Solutions for Clearing Up Cloudy Water

If you’re concerned about cloudy water from your new refrigerator filter, there are several effective solutions to expedite the clearing process:
Immediate Actions
- Flush the system: Run 2-3 gallons of water through the filter continuously or in large batches. This helps clear air bubbles and loose carbon particles faster than intermittent use.
- Let it sit: Fill a clear glass with water and observe. If the cloudiness clears from bottom to top within minutes, it’s just air bubbles that will resolve with time.
- Cold water flush: Use the coldest setting when flushing, as cold water holds more air and can help remove bubbles more effectively.
For Persistent Cloudiness
If cloudiness persists beyond the normal break-in period, try these more advanced solutions:
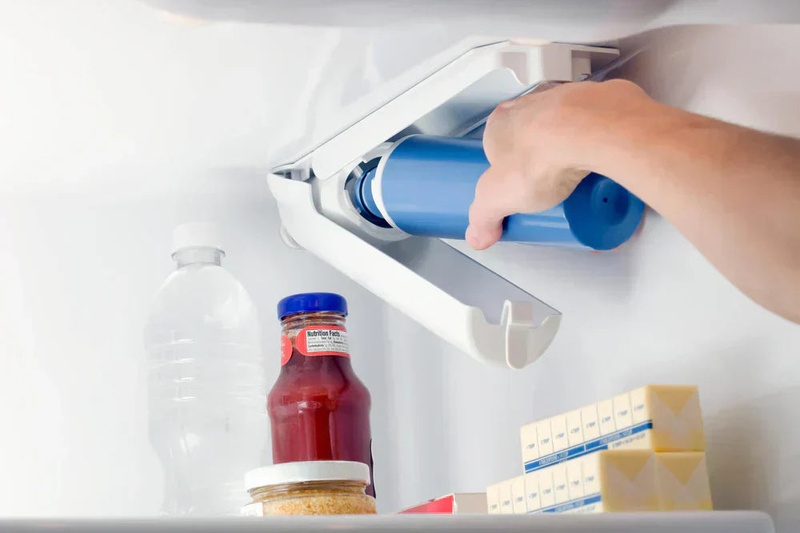
- Check installation: Remove and reinstall the filter, ensuring it’s properly seated and locked in position.
- Inspect for damage: Examine the filter for cracks or defects that might allow filter media to leak into your water.
- Contact manufacturer: Some filter brands have specific break-in procedures or may replace defective units.
- Secondary filtration: Temporarily use a countertop filter pitcher for drinking water until the refrigerator filter clears.
Comparing Different Refrigerator Filter Types
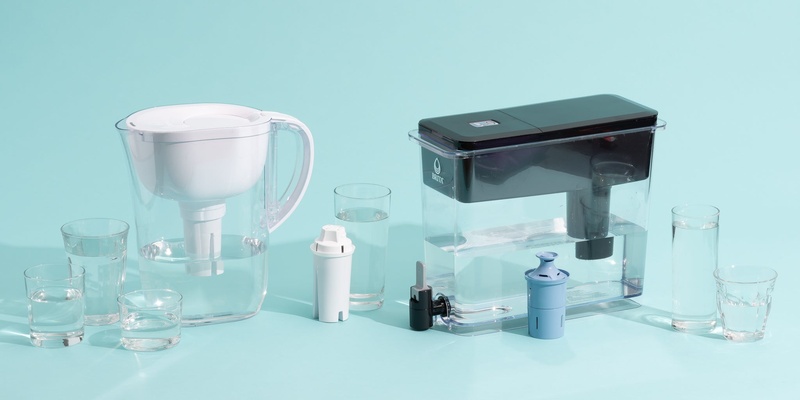
Not all refrigerator filters are created equal, and some types are more prone to causing temporary cloudiness than others. Understanding these differences can help you make informed decisions about replacement filters.
| Filter Type | Filtration Method | Cloudiness Potential | Typical Cost Range | Lifespan |
|---|---|---|---|---|
| Carbon Block | Activated carbon compression | Medium-High | $30-$60 | 6 months |
| Granular Carbon | Loose carbon particles | High | $20-$45 | 3-6 months |
| Carbon/KDF Combination | Carbon plus kinetic degradation fluxion | Medium | $40-$70 | 6-9 months |
| Ceramic/Carbon Hybrid | Ceramic outer layer with carbon core | Low | $50-$80 | 9-12 months |
| OEM Branded | Varies by manufacturer | Low-Medium | $40-$90 | 6 months |
| Generic/Aftermarket | Varies widely | Medium-High | $15-$40 | 3-6 months |
Preventing Cloudy Water With Future Filter Changes
You can minimize cloudy water issues during future filter changes by following these best practices:
- Pre-soak the filter: Some manufacturers recommend soaking new filters in cold water for 15 minutes before installation to displace air and prime the media.
- Slow installation: Insert the new filter slowly and gently to reduce air entrapment during the process.
- Schedule planned flushing: After installation, immediately run 2-3 gallons through the system before using for consumption.
- Choose quality filters: Higher-quality filters often have better manufacturing processes that reduce initial carbon shedding.
- Follow manufacturer directions: Each filter brand may have specific installation instructions to minimize cloudiness.
Maintaining a consistent replacement schedule can also help. Filters changed too infrequently may develop channeling (where water finds paths of least resistance), which can lead to more cloudiness during the next replacement due to disturbed sediment.
Call 888-896-7031 for Free Local HVAC Quotes – Compare and Save Today!
When to Contact a Professional
While temporary cloudiness is normal, certain situations warrant professional attention. Contact a professional if:
- Persistent cloudiness: Water remains cloudy after dispensing 10+ gallons or using for more than a week.
- Color or odor changes: The water develops a yellow, brown, or greenish tint, or has a foul smell.
- Visible particles: Large or colored particles appear in the water (beyond small black carbon specks).
- Decreased flow rate: Water flow slows significantly after filter installation and doesn’t improve.
- System leaks: Any water leakage around the filter housing or connections.
When contacting a professional, be prepared to share details about your refrigerator model, filter type, when you installed it, and specific symptoms you’re experiencing. This information helps technicians diagnose the problem more efficiently.
Remember that refrigerator water systems are complex and may sometimes require specialized knowledge to troubleshoot effectively. Most manufacturers maintain support lines specifically for water quality issues, which can be a good first step before scheduling an in-home service call.
Tips for Getting the Best HVAC Prices
- Prioritize Quality Over Cost
The most critical factor in any HVAC project is the quality of the installation. Don’t compromise on contractor expertise just to save money. - Check for Rebates
Always research current rebates and incentives — they can significantly reduce your overall cost. - Compare Multiple Quotes
Request at least three estimates before making your choice. You can click here to get three free quotes from local professionals. These quotes include available rebates and tax credits and automatically exclude unqualified contractors. - Negotiate Smartly
Once you've chosen a contractor, use the proven strategies from our guide — How Homeowners Can Negotiate with HVAC Dealers — to get the best possible final price.