Experiencing no water from your refrigerator dispenser after changing the filter is a frustrating but common issue that affects many homeowners. This problem typically stems from several possible causes including trapped air in the water lines, improper filter installation, or incompatible filter models. Most refrigerator water dispensing issues can be resolved through simple troubleshooting steps without professional assistance. Understanding the underlying causes and following systematic troubleshooting methods can quickly restore water flow and ensure your refrigerator’s water dispensing system functions properly.
When you replace your refrigerator’s water filter and suddenly find no water coming from the dispenser, several potential culprits may be responsible. Air trapped in the water line is the most frequent cause, creating an airlock that prevents water flow. This commonly occurs during the filter change process when the water supply is temporarily disconnected.
Improper filter installation is another leading cause, where the filter isn’t fully seated or correctly aligned in its housing. Some refrigerator models require specific installation techniques, such as turning the filter to lock it into position or removing a cap from a new filter before installation.
Using an incompatible or incorrect replacement filter can also cause water flow problems. Non-OEM (Original Equipment Manufacturer) filters may not fit properly or might lack the exact specifications needed for your particular refrigerator model.
- Filter not properly primed or activated
- Clogged water supply line
- Frozen water tube inside the refrigerator
- Malfunctioning water inlet valve
- Filter lock-out features not properly reset
Content Navigation
Step-By-Step Troubleshooting Guide
Verify Proper Filter Installation
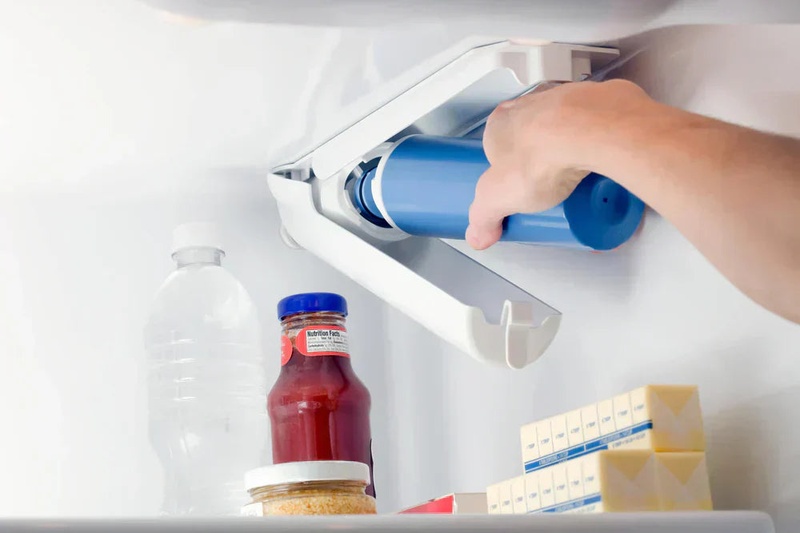
First, check that you’ve installed the filter correctly according to your refrigerator’s user manual. Remove and reinstall the filter, ensuring it clicks or locks into place completely. Some filters require a quarter-turn after insertion to secure them properly. Improper alignment can prevent the internal valve from opening, blocking water flow entirely.
Make sure you’ve removed any protective caps or seals from the new filter. Many replacement filters come with plastic caps that must be removed before installation, though some people overlook this step, creating an immediate blockage in the system.
Call 888-896-7031 for Free Local HVAC Quotes – Compare and Save Today!
Purge Air From The System
After confirming proper installation, you’ll need to purge air from the water lines. Hold the water dispenser lever for 3-5 minutes continuously, even if no water appears immediately. This extended dispensing helps push trapped air through the system. For some models, you may need to repeat this process several times with short breaks in between.
If your refrigerator has an internal water reservoir, it may take up to 24 hours to fill completely after a filter change. During this period, water flow might be inconsistent or slower than normal until the reservoir refills completely.
Reset The Filter Indicator
Many modern refrigerators require resetting the filter indicator after replacement. Failure to reset can trigger a filter lock-out mechanism in some models, preventing water dispensing until the system recognizes a new filter has been installed. The reset procedure varies by manufacturer and model:
| Brand | Common Reset Method |
|---|---|
| Samsung | Press and hold “Alarm/Filter Reset” button for 3 seconds |
| LG | Press and hold “Filter” or “Reset” button for 3-5 seconds |
| Whirlpool | Press and hold “Light” or “Filter Reset” button for 3 seconds |
| GE | Press and hold “Reset Filter” or specified button combination for 3 seconds |
Check Water Supply Line
Verify that the refrigerator’s water supply line is not kinked, frozen, or otherwise obstructed. Ensure the water supply valve behind the refrigerator is fully open. Sometimes during filter maintenance, the water supply valve gets accidentally bumped or partially closed, restricting water flow to the appliance.
If your refrigerator has been recently moved, check that the water line connection at the back of the unit remains intact and hasn’t been damaged or loosened during repositioning.
Brand-Specific Solutions
Different refrigerator brands have their own quirks and common issues after filter changes. Knowing the specific protocols for your brand can save significant troubleshooting time. Here are some brand-specific solutions:
Call 888-896-7031 for Free Local HVAC Quotes – Compare and Save Today!
Samsung Refrigerators
Samsung models often require a specific priming procedure. After installing a new filter, dispense at least 2-3 gallons of water to fully activate the system. Some Samsung smart refrigerators need filter authentication through the SmartThings app, especially if using Samsung-branded filters with RFID chips.
If water still doesn’t flow, check for a small shut-off valve directly on the filter housing that might have closed during the replacement process. Older Samsung models may require pressing the “Child Lock” and “Lighting” buttons simultaneously for 5 seconds as part of the reset process.
LG Refrigerators
LG refrigerators typically feature a filter bypass plug that can be used to determine if the filter itself is causing the issue. Remove the new filter and insert the bypass plug – if water flows with the bypass plug, the filter is likely defective or incompatible.
Many LG models also have a specific air purge function activated by pressing the water dispenser paddle for 1 minute, releasing for 5 seconds, then repeating 3-4 times. This cycle helps clear air more efficiently than continuous dispensing.
Whirlpool and KitchenAid Refrigerators
Whirlpool-manufactured refrigerators (including KitchenAid, Maytag, and JennAir) often have a quarter-turn filter installation mechanism that must be precisely aligned. Listen for a definitive “click” when installing the filter to ensure proper positioning.
These models typically require dispensing 4-5 gallons of water after a filter change to purge air and carbon fines from the new filter. The first few cups might appear cloudy or contain black specs, which is normal from the carbon filter media.
Advanced Troubleshooting Steps
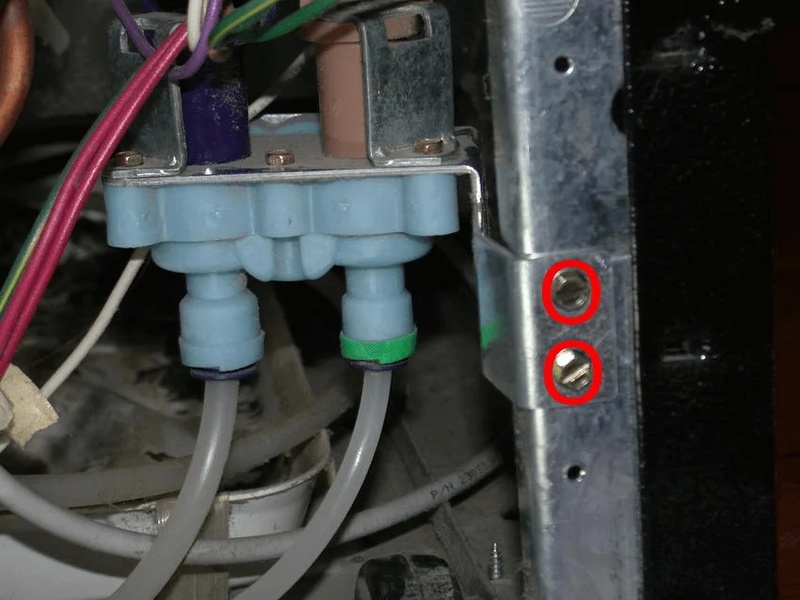
If basic troubleshooting doesn’t resolve the issue, several more advanced steps may help. Checking the water inlet valve is critical – this component controls water flow into the refrigerator and can fail independently of filter changes. The valve is usually located at the back of the refrigerator near the bottom.
Testing water pressure is another important diagnostic step. Most refrigerator water systems require at least 20 PSI (pounds per square inch) to function properly. Low household water pressure can prevent water dispensing even with a perfectly installed filter.
| Component | Symptom | Solution |
|---|---|---|
| Water Inlet Valve | No water flow at all | Test valve with multimeter or replace (typically $20-50) |
| Water Line | Reduced flow or intermittent water | Check for kinks, freeze points, or blockages |
| Filter Head Assembly | Leakage or no flow despite proper filter | Replace filter head assembly (typically $50-100) |
| Control Board | Reset attempts fail, multiple functions affected | Diagnostic test or board replacement (typically $100-300) |
When To Call A Professional
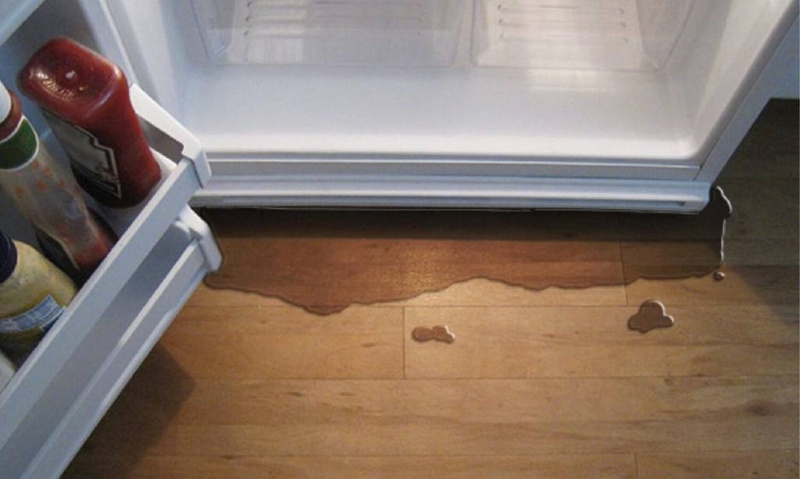
While most water dispensing issues after filter changes can be resolved through DIY troubleshooting, certain situations warrant professional assistance. Call a technician if you notice water leaking inside the refrigerator after attempting filter replacement, as this could indicate a more serious problem with the water distribution system.
Similarly, if you’ve thoroughly verified proper installation, reset the system, and still have no water flow after 24 hours, a professional diagnosis may be necessary. This is particularly true if other refrigerator functions like ice making have also stopped working, suggesting a possible control board or major component failure.
Issues with the water inlet valve or internal water lines often require specialized tools and expertise. Professional service calls typically cost between $75-150 for diagnosis, plus parts and labor for any necessary repairs.
Preventing Future Water Dispenser Issues
Maintaining a consistent filter replacement schedule is the best prevention against water dispensing problems. Most manufacturers recommend changing refrigerator water filters every six months or after filtering approximately 300-500 gallons of water, whichever comes first.
When purchasing replacement filters, always verify compatibility with your specific refrigerator model. While aftermarket filters may be less expensive, OEM filters are designed precisely for your appliance’s specifications and often prevent fitting and performance issues.
Before any filter change, run through a mental checklist: turn off ice maker, have towels ready for water spillage, and review the manufacturer’s replacement procedure. Taking these preventative steps can significantly reduce the likelihood of experiencing no water flow after future filter changes.
Tips for Getting the Best HVAC Prices
- Prioritize Quality Over Cost
The most critical factor in any HVAC project is the quality of the installation. Don’t compromise on contractor expertise just to save money. - Check for Rebates
Always research current rebates and incentives — they can significantly reduce your overall cost. - Compare Multiple Quotes
Request at least three estimates before making your choice. You can click here to get three free quotes from local professionals. These quotes include available rebates and tax credits and automatically exclude unqualified contractors. - Negotiate Smartly
Once you've chosen a contractor, use the proven strategies from our guide — How Homeowners Can Negotiate with HVAC Dealers — to get the best possible final price.