Experiencing hot or warm water from your refrigerator dispenser after replacing the water filter is a common yet frustrating issue many homeowners face. This problem typically occurs because the new filter requires proper flushing to remove trapped air and carbon particles. When you install a new filter, the water may need time to cool as it passes through the refrigeration system. Understanding the causes behind this temporary inconvenience can help you resolve it quickly and efficiently. Several factors including improper installation, air in the water line, or system issues could be contributing to the unexpected temperature change in your water dispenser.
When you replace your refrigerator water filter, several mechanisms can lead to temporarily warmer water. The primary reason is air trapped in the water lines during the filter change process. This air needs to be purged completely for normal operation to resume. Additionally, new carbon filters contain loose carbon particles that need flushing out before optimal filtration occurs.
Another common cause is that water sitting in the supply line hasn’t had sufficient time to cool. The refrigeration system needs time to chill the fresh water passing through the new filter. In most refrigerators, water must travel through room-temperature pipes before reaching the cooling system, which can contribute to the warmer initial dispensing temperature.
Content Navigation
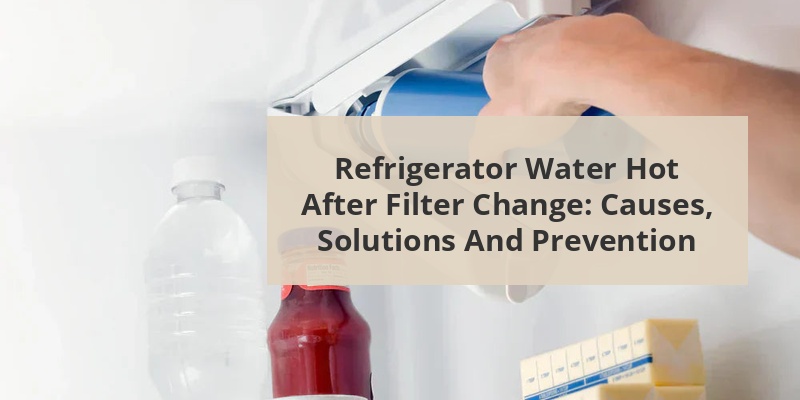
How to Properly Flush a New Refrigerator Filter
Proper flushing is crucial after installing a new water filter. Follow these steps to ensure your water returns to the desired temperature:
- After installation, dispense at least 2-3 gallons of water through the system
- Discard this initial water as it may contain carbon particles and trapped air
- Dispense in 30-second intervals, allowing the system to recalibrate between flushes
- Check for any leaks around the filter housing while flushing
- Allow 24 hours for the system to fully cool the water line
Many filter manufacturers recommend flushing 3-5 minutes of continuous water flow. This process removes air pockets and loose carbon particles while allowing new water to enter the cooling system. Be patient during this process as rushing it may result in continued temperature issues.
Troubleshooting Other Potential Causes
Improper Filter Installation
An incorrectly installed filter can cause various issues including temperature problems. Ensure your filter is properly seated and locked into position. A loose filter can allow water to bypass the cooling system entirely. Check that the filter aligns correctly with the housing and that you’ve twisted it fully into the locked position according to manufacturer instructions.
Call 888-896-7031 for Free Local HVAC Quotes – Compare and Save Today!
Refrigerator Temperature Settings
Your refrigerator’s temperature settings may impact water temperature. If the fridge itself isn’t properly cooling, the water dispensing system may also be affected. Verify that your refrigerator maintains the recommended temperature of 37-40°F (2.8-4.4°C). Adjust settings if necessary and monitor for improvements.
Water Line Issues
Water supply lines that run close to heat sources can cause warmer water. Check that your refrigerator’s water line isn’t positioned near heating ducts, hot water pipes, or direct sunlight. Insulating exposed water lines can help maintain cooler temperatures, especially in warmer climates or during summer months.
When To Call a Professional
If you’ve tried all troubleshooting steps and your refrigerator water remains hot after 24-48 hours, it may indicate a more serious issue. Consider contacting a professional when:
- Water remains consistently warm despite proper flushing
- You notice unusual noises coming from the refrigerator’s cooling system
- The refrigerator itself isn’t maintaining proper temperature
- You detect water leaks or moisture around the filter housing
- The filter appears damaged or doesn’t fit properly
Professional technicians can diagnose potential problems with the water valve, cooling coils, or thermostat that may be affecting your water temperature. These repairs typically require specialized tools and expertise beyond standard DIY maintenance.
Comparing Different Filter Types and Their Impact
| Filter Type | Initial Flush Required | Time to Normal Temperature | Common Issues |
|---|---|---|---|
| OEM (Original Equipment Manufacturer) | 2-3 gallons | 4-12 hours | Higher cost, better compatibility |
| Aftermarket Carbon Filters | 3-4 gallons | 12-24 hours | More carbon dust, longer flush needed |
| Generic Replacement Filters | 4+ gallons | 24-48 hours | Potential fit issues, more air trapping |
| Inline External Filters | 1-2 gallons | 2-8 hours | Less cooling integration, faster recovery |
OEM filters typically provide the fastest return to normal water temperature after installation. They’re designed specifically for your refrigerator model, minimizing installation problems that could affect water temperature.
Preventive Measures For Future Filter Changes
To avoid hot water issues with future filter replacements, implement these preventive practices:
Call 888-896-7031 for Free Local HVAC Quotes – Compare and Save Today!
- Turn off the water supply to the refrigerator before changing the filter
- Have towels ready to catch any water that may leak during the process
- Replace filters during evening hours, allowing overnight cooling before morning use
- Mark your calendar for regular filter changes to prevent buildup issues
- Keep replacement filters at room temperature before installation
Scheduling regular filter changes every 6 months (or according to manufacturer recommendations) helps prevent mineral buildup that can impact cooling efficiency. Consistent maintenance preserves water quality and helps maintain proper temperature regulation in your refrigerator’s water dispensing system.
Normal Timeline for Water Temperature Normalization
Understanding the typical timeline for water temperature normalization can help manage expectations after a filter change. Most refrigerators will return to normal dispensing temperatures within the following timeframe:
- First 1-2 hours: Water likely to be room temperature or warmer
- 2-6 hours: Water begins cooling but may still be cooler than desired
- 6-12 hours: Most systems return to normal cooling capacity
- 12-24 hours: Full cooling capacity should be restored in all refrigerator models
This timeline can vary based on refrigerator model, filter type, and home temperature. Newer refrigerator models with enhanced cooling technology may return to normal temperatures more quickly than older units. Patience is essential as rushing the process by constantly dispensing water can actually extend the time needed for normalization.
Tips for Getting the Best HVAC Prices
- Prioritize Quality Over Cost
The most critical factor in any HVAC project is the quality of the installation. Don’t compromise on contractor expertise just to save money. - Check for Rebates
Always research current rebates and incentives — they can significantly reduce your overall cost. - Compare Multiple Quotes
Request at least three estimates before making your choice. You can click here to get three free quotes from local professionals. These quotes include available rebates and tax credits and automatically exclude unqualified contractors. - Negotiate Smartly
Once you've chosen a contractor, use the proven strategies from our guide — How Homeowners Can Negotiate with HVAC Dealers — to get the best possible final price.