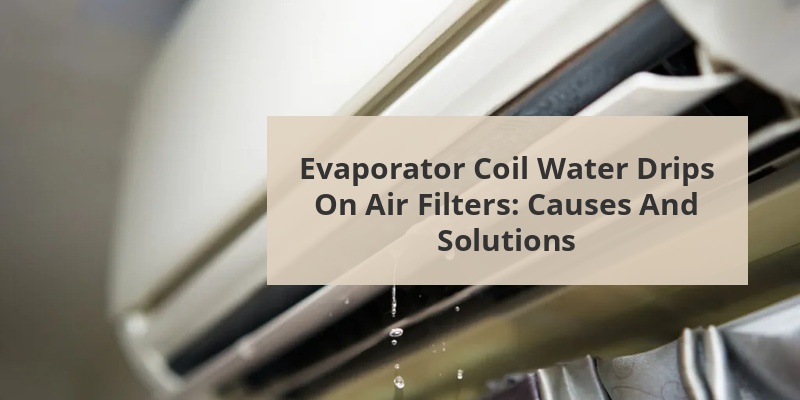
When your air conditioning system’s evaporator coil drips water onto the filter, it indicates an issue that requires attention. This common HVAC problem occurs when condensation from the cooling process isn’t properly channeled away from the system. Excess moisture on filters can lead to reduced efficiency, mold growth, and potential system damage if left untreated. Understanding why this happens, how to identify the problem, and what solutions are available can help homeowners maintain their cooling systems effectively and avoid costly repairs.
The evaporator coil is a critical component of your air conditioning system that absorbs heat from indoor air. As warm air passes over the cold coil, moisture naturally condenses on the coil’s surface – similar to water droplets forming on a cold glass. This condensation is a normal part of the cooling process and is typically collected in a drain pan beneath the coil.
In a properly functioning system, this condensate flows through a drain line and is discharged outside your home or into a drain. The system is designed to handle this moisture without affecting other components like the air filter. When water appears on your filter, it signals that something in this drainage system isn’t working as intended.
Content Navigation
Common Causes of Water Dripping on Filters
Clogged Drain Line
The most frequent cause of water dripping onto filters is a clogged condensate drain line. Over time, algae, mold, dirt, and debris can accumulate in the drain line, blocking the normal flow of water. When this happens, water backs up in the drain pan and eventually overflows, potentially dripping onto the filter if it’s positioned below the coil.
Improper Installation or Slope
Sometimes, the condensate drain line lacks sufficient downward slope to allow proper water flow. Without adequate gravitational pull, water can stagnate in the line and eventually back up into the system. Proper installation requires a minimum 1/4-inch slope per foot of horizontal drain line for effective drainage.
Frozen Evaporator Coil
When an evaporator coil freezes and then thaws, it produces more water than the drainage system can handle. This excess water can overwhelm the drain pan and drip onto filters. Frozen coils typically result from restricted airflow, refrigerant issues, or operating the system in too cold conditions.
Call 888-896-7031 for Free Local HVAC Quotes – Compare and Save Today!
Damaged Drain Pan
Over time, drain pans can rust, crack, or develop holes, allowing water to leak through instead of flowing to the drain line. Older systems are particularly susceptible to drain pan deterioration, which can direct water toward filters and other components not designed to handle moisture.
| Cause | Symptoms | DIY Fixable? |
|---|---|---|
| Clogged Drain Line | Standing water, algae growth | Yes (in most cases) |
| Improper Slope | Slow drainage, backup | Sometimes |
| Frozen Coil | Ice formation, reduced cooling | Limited fixes possible |
| Damaged Drain Pan | Visible cracks, rust spots | Typically requires replacement |
Effects of Water on Air Filters
When filters become wet from dripping evaporator coils, several issues can develop. Wet filters cannot effectively capture particles and contaminants as designed, dramatically reducing air quality in your home. The decreased airflow through saturated filters forces your system to work harder, increasing energy consumption and utility bills.
More concerning is that wet filters create ideal conditions for mold and bacteria growth. These microorganisms can then be distributed throughout your home’s air supply, potentially causing respiratory issues and allergic reactions for occupants. Additionally, consistently wet filters deteriorate faster, requiring more frequent replacements.
Diagnosing the Issue
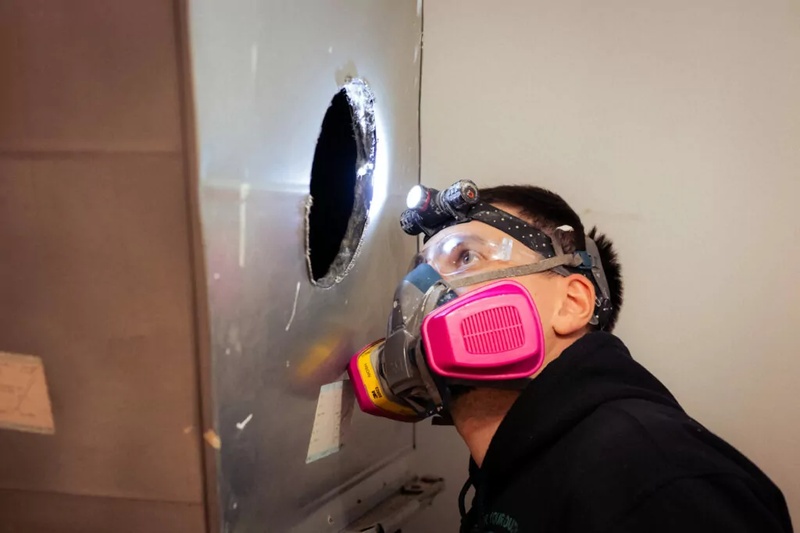
Before attempting repairs, confirm that water is indeed coming from the evaporator coil rather than another source. Start by turning off your HVAC system for safety and remove the access panel to inspect the evaporator coil area.
Look for standing water in the drain pan, visible clogs in the drain line, or signs of overflow. Check the filter for wet spots or water stains – if wetness appears only on the top portion (facing the coil), this confirms the evaporator coil as the source. Also examine the coil itself for ice formation or excessive frost, which indicates freezing issues.
Using a Wet/Dry Vacuum Test
One effective diagnostic method is the vacuum test. Disconnect the drain line at its exit point and attach a wet/dry vacuum. Seal around the connection and run the vacuum for 1-2 minutes. If a significant amount of water and debris is pulled through, a clog was likely your issue. If little to nothing comes through, the problem may be more complex.
Call 888-896-7031 for Free Local HVAC Quotes – Compare and Save Today!
DIY Solutions for Dripping Evaporator Coils
Clearing Clogged Drain Lines
For clogged drain lines, several DIY methods can be effective. A mixture of bleach and water (1:1 ratio) poured into the access point of the drain line can kill algae and break down blockages. Alternatively, vinegar works well and is less harsh. For stubborn clogs, a specialized drain line brush or compressed air can dislodge debris.
Many newer HVAC systems have access points specifically designed for drain line maintenance. Look for a T-shaped fitting with a removable cap on the drain line near the indoor unit. After clearing, flush with clean water to ensure proper flow.
Addressing Frozen Coils
If your evaporator coil is freezing, first replace any clogged air filters as restricted airflow is a common cause. Turn off the cooling function but leave the fan running to help thaw the ice without damaging the system. Once thawed, check refrigerant levels – low refrigerant often causes freezing but requires professional attention.
Temporary Drain Pan Solutions
For damaged drain pans, temporary fixes include waterproof sealants designed for HVAC applications. However, these are short-term solutions, and replacement of the drain pan is the only permanent fix for cracks or corrosion. Some systems allow for auxiliary drain pans to be installed as additional protection.
| Solution | Materials Needed | Difficulty Level |
|---|---|---|
| Drain Line Cleaning | Bleach/vinegar, wet/dry vacuum | Easy |
| Fixing Improper Slope | Level, supports, pipe connectors | Moderate |
| Thawing Frozen Coil | None (system controls only) | Easy |
| Drain Pan Repair | HVAC sealant, replacement pan | Moderate to Difficult |
Preventative Maintenance

Regular maintenance is the best defense against evaporator coil drainage issues. Schedule quarterly checks of your drain pan and line, particularly before heavy-use seasons. Pour a cup of vinegar down the drain line every 1-2 months during cooling season to prevent algae and mold growth.
Keep the area around your indoor unit clean and dust-free to prevent debris from entering the system. Replace air filters according to manufacturer recommendations – typically every 30-90 days depending on filter type and household conditions. Consider installing a float switch that automatically shuts off the system if water begins to back up, preventing overflow before it reaches the filter.
Professional Maintenance Recommendations
While many maintenance tasks can be performed by homeowners, annual professional inspections are highly recommended for comprehensive system care. HVAC technicians can conduct thorough cleanings of components not easily accessible to homeowners, check refrigerant levels, and identify potential issues before they cause water problems.
Professional services typically include drain line clearing with specialized equipment, coil cleaning to remove biofilm that can impede proper drainage, and inspection of all drainage components. These services cost between $75-$200 depending on your location and system complexity but can prevent much costlier water damage repairs.
When to Call a Professional
While many dripping issues can be resolved with DIY approaches, certain situations warrant professional intervention. Call an HVAC technician immediately if you notice:
- Water damage to surrounding ceilings or walls
- Electrical components near standing water
- Persistent freezing despite addressing airflow issues
- Multiple recurring drainage problems
- System age exceeding 10-15 years with drainage issues
Professionals have specialized tools like endoscopic cameras to inspect deep within drain lines, pressure testing equipment to identify leaks, and refrigerant handling certification required for addressing coolant-related issues. For complex problems, their expertise can save time and prevent further system damage.
Tips for Getting the Best HVAC Prices
- Prioritize Quality Over Cost
The most critical factor in any HVAC project is the quality of the installation. Don’t compromise on contractor expertise just to save money. - Check for Rebates
Always research current rebates and incentives — they can significantly reduce your overall cost. - Compare Multiple Quotes
Request at least three estimates before making your choice. You can click here to get three free quotes from local professionals. These quotes include available rebates and tax credits and automatically exclude unqualified contractors. - Negotiate Smartly
Once you've chosen a contractor, use the proven strategies from our guide — How Homeowners Can Negotiate with HVAC Dealers — to get the best possible final price.