A clean window AC unit ensures optimal performance, improved indoor air quality, and lower energy costs. Neglecting maintenance can lead to reduced efficiency, unpleasant odors, and even damage. This comprehensive guide covers every step and tip necessary to safely and effectively clean a window air conditioner at home. *Keep your window AC running smoothly* by following these expert-backed cleaning methods and troubleshooting advice.
Content Navigation
- Window AC Unit Cleaning Overview
- Why Regular Cleaning Matters
- Essential Tools And Safety Equipment
- Step-By-Step Guide To Cleaning A Window AC Unit
- Preparation: Unplug And Situate The Unit
- Remove The Front Grille Or Cover
- Take Out And Clean The Filter
- Vacuum Out Interior Dust And Debris
- Clean The Evaporator And Condenser Coils
- Straighten Bent Fins With A Fin Comb
- Disinfect And Deodorize To Prevent Mold
- Check And Clear The Drainage System
- Clean The Fan And Blower Wheel
- Inspect Wiring And Components
- Clean The Exterior And Reassemble
- Test And Confirm Proper Operation
- How Often Should You Clean A Window AC Unit?
- Signs Your Window AC Needs Cleaning
- Helpful Tips For Maintaining Your Window AC Unit
- What To Avoid When Cleaning A Window AC
- Choosing The Right Cleaning Supplies
- Deep Cleaning Vs. Regular Maintenance
- Troubleshooting Common Issues After Cleaning
- Frequently Asked Questions About Window AC Cleaning
- Seasonal Storage And Off-Season Care
- Energy-Saving Tips For Efficient Operation
Window AC Unit Cleaning Overview
| Process Step | Tools & Materials Needed | Key Purpose |
|---|---|---|
| Preparation & Safety | Screwdriver, gloves, mask | Ensures safety, prevents damage |
| Removing & Washing Filters | Vacuum, mild soap, water | Improves air quality, efficiency |
| Cleaning Fins & Coils | Fin comb, soft brush, coil cleaner | Enhances cooling & airflow |
| Clearing Drainage & Exterior | Cloth, pan, detergent | Prevents leaks, prolongs lifespan |
| Reassembly & Testing | Screwdriver, patience | Ensures everything works perfectly |
Why Regular Cleaning Matters
Regularly cleaning a window AC unit is critical for maintaining peak performance and maximizing unit lifespan. Dust, pollen, pet dander, and pollutants accumulate inside the machine, straining the motor and compressor. A clogged filter or coil can reduce the system’s cooling efficiency by up to 15%, leading to higher utility bills and discomfort. Routine cleaning also improves indoor air quality and prevents mold growth, which is especially important for those with allergies or respiratory issues. Most manufacturers recommend a thorough cleaning at least once per season.
Essential Tools And Safety Equipment
Before starting any cleaning task, gather the following tools and supplies:
- Screwdriver set (usually Phillips for most window units)
- Soft brush (such as a toothbrush or paintbrush)
- Vacuum cleaner with hose attachment
- Microfiber cloth or sponge
- Basin or bucket
- Mild dish soap or coil cleaner
- Fin comb (optional, for straightening bent fins)
- Gloves and disposable mask
Always unplug the AC unit before cleaning to avoid electric shock and other hazards. Wearing gloves and a mask protects your hands and lungs from dust and mold spores during the process. For units installed above ground floor, it’s best to have a helper or temporarily remove the unit from the window for a deep seasonal clean.
Step-By-Step Guide To Cleaning A Window AC Unit
Preparation: Unplug And Situate The Unit
Ensure the AC unit is turned off and unplugged before starting. If convenient and safe to do so, remove it from the window and place it on a flat surface. Protect your workspace with towels or plastic sheeting to catch drips and debris.
Remove The Front Grille Or Cover
Most window AC units have a front cover secured by screws or simple clips. Carefully remove these using a screwdriver. Set aside all screws in a bowl to avoid losing them. Wipe the grille with a damp cloth to remove dust and dirt.
Call 888-896-7031 for Free Local HVAC Quotes – Compare and Save Today!
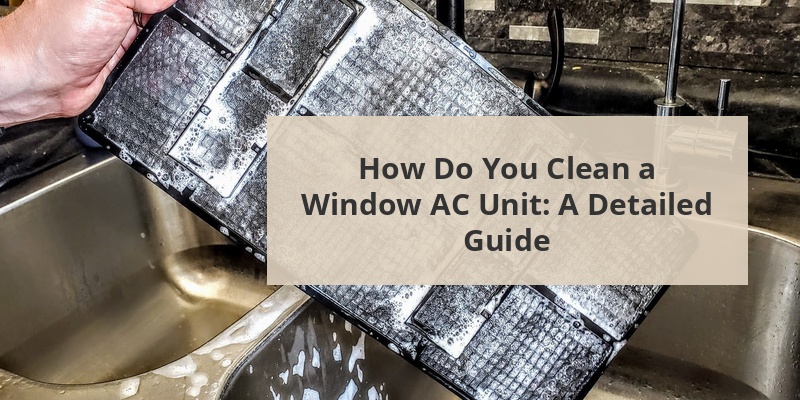
Take Out And Clean The Filter
The filter is the first line of defense against airborne debris. Gently pull out the filter—usually located right behind the front cover. Vacuum both sides to remove loose dust. Wash the filter in a basin with warm water and mild dish soap. Rinse thoroughly and let it dry completely before reinstalling. If the filter is severely clogged or torn, replace it according to the manufacturer’s instructions.
Vacuum Out Interior Dust And Debris
Using a vacuum cleaner with a hose or brush attachment, gently vacuum out the inside chamber, focusing on the evaporator coils, fan blades, and surrounding areas. Be careful not to bend delicate fins or disturb electrical components.
Clean The Evaporator And Condenser Coils
The coils are essential for heat transfer and efficient cooling. Dust and dirt buildup acts as insulation, reducing performance. Use a soft brush to dislodge debris, then spray coil cleaner (or a diluted soap solution) directly onto the coil surfaces. Allow several minutes for the cleaner to break down grime, then gently wipe with a damp cloth.
Straighten Bent Fins With A Fin Comb
The thin metal fins covering the coils are easily bent and can restrict airflow. Carefully straighten them using a dedicated fin comb or a blunt knife, taking care not to puncture or damage the coils. A fin comb can restore lost efficiency and help reduce strain on the unit.
Disinfect And Deodorize To Prevent Mold
A lingering musty odor indicates mold or mildew. Prepare a solution of equal parts water and white vinegar, or use a non-abrasive commercial disinfectant. Wipe any accessible inner surfaces, paying special attention to damp corners where mold typically grows. Proper ventilation and regular cleaning help prevent future odors.
Check And Clear The Drainage System
Window AC units generate condensation that must drain properly. Locate the drain hole or tray on the bottom rear. Remove any visible debris or blockages with a brush or toothpick. Pour a small amount of water through the drain to confirm it flows freely. Mold or clogs here can cause leaks and water damage to the window sill or wall.
Call 888-896-7031 for Free Local HVAC Quotes – Compare and Save Today!
Clean The Fan And Blower Wheel
Carefully access the fan blade or blower wheel, usually accessible after removing the cover. Wipe dust and dirt away with a damp cloth. For thicker grime, use a soap solution sparingly, being sure not to drip water onto electrical connections. A clean fan ensures quiet operation and efficient cooling airflow.
Inspect Wiring And Components
While cleaning, inspect visible wiring for fraying, corrosion, or wear. Loose or damaged wires can cause shorts, malfunctions, or even fires. If you notice any electrical issues, consult a professional technician before reinstalling or operating the AC unit.
Clean The Exterior And Reassemble
Wipe down the outside casing with a soapy cloth, removing dust and environmental residue. Rinse with a clean, damp cloth and dry thoroughly. Reinstall the air filter when completely dry, replace the front grille, and tighten all screws. Ensure no parts are left loose or out of alignment.
Test And Confirm Proper Operation
Plug the AC back in and run it for several minutes. Listen for unusual noises, check for cool airflow, and inspect the window area for leaks or water drips. If everything sounds and feels normal, your cleaning is successful. If problems persist, further professional maintenance may be needed.
How Often Should You Clean A Window AC Unit?
It’s recommended to clean the filter at least once a month during cooling season—more often if you live in a dusty environment or have pets. A full deep-cleaning (as described above) should be performed at least once before the start of each cooling season, or whenever you notice reduced performance, increased noise, or musty smells.
Signs Your Window AC Needs Cleaning
- Reduced cooling efficiency (e.g., longer cycles, weak airflow)
- Unpleasant smells or visible mold
- Energy bills rising unexpectedly
- Noticeable dust or debris in vents
- Water leaks or dripping inside the room
- Louder than normal operating noise or vibrations
Pay close attention to these warning signs to avoid expensive repairs or premature replacement.
Helpful Tips For Maintaining Your Window AC Unit
- Install the AC in a shaded window to reduce sun exposure and extend its life.
- Seal the edges and gaps around the unit to prevent drafts and water intrusion.
- Avoid using high-pressure water or harsh chemicals which may damage delicate coils and electronics.
- Consider professional cleaning if the unit is heavily soiled, has significant mold, or internal access is difficult.
- Check the manufacturer’s manual for specific maintenance recommendations for your model.
What To Avoid When Cleaning A Window AC
- Never operate the unit while wet or with missing parts.
- Do not bend or puncture coil fins; always use gentle tools.
- Avoid submerging electrical components in water—clean with a damp (not wet) cloth.
- Never use bleach or abrasive cleaners as these can corrode parts.
- If unsure, contact a certified HVAC tech rather than risk damaging your unit.
Choosing The Right Cleaning Supplies
| Parts To Be Cleaned | Recommended Cleaner | Tools |
|---|---|---|
| Filter | Mild dish soap & warm water | Soft brush, sponge |
| Coils | Commercial coil cleaner or vinegar solution | Coil brush, fin comb |
| Exterior | All-purpose detergent | Cloth, sponge |
| Fan blades | Mild soap & water | Microfiber cloth |
| Drain channels | Vinegar or disinfectant | Cotton swab, brush |
Deep Cleaning Vs. Regular Maintenance
Routine maintenance (monthly filter rinse and periodic dusting) helps keep your unit in good working condition day to day. However, a deep seasonal cleaning addresses less accessible dirt, mold, and buildup inside the chassis. For many users, professional annual service may be warranted, especially in humid climates or older units showing persistent problems.
Troubleshooting Common Issues After Cleaning
If the unit fails to power on after cleaning:
- Check that it is fully dry before plugging in.
- Inspect the power cord, plug, and outlet for signs of damage.
- Check the circuit breaker or fuse panel for blown fuses.
If airflow is weak or noisy:
- Verify the filter is installed correctly and is fully dry.
- Ensure the fan blades and coils are free from residue and obstructions.
- Recheck the unit’s assembly for loose screws or parts.
Pooling water or leaks inside may indicate:
- Clogged or misaligned drain channels
- Improper installation angle (the back should tilt slightly downward)
Frequently Asked Questions About Window AC Cleaning
Can I Use A Hose To Clean My AC Unit?
While a gentle hose spray may be used for exterior cleaning outdoors, never use high-pressure water on coils or electrical components, as this can cause damage or force water into delicate areas.
Are All Window AC Filters Washable?
Most standard window AC filters are washable, but some high-efficiency or antimicrobial models may require periodic replacement instead. Consult your owner’s manual for filter-specific guidance.
How Can I Prevent Mold Growth?
Regularly clean filters and coils, operate the AC in “dry mode” if available, and ensure adequate drainage. Running a dehumidifier in the same room also helps during humid months.
What If Cleaning Doesn’t Solve The Problem?
If performance does not improve after thorough cleaning, the unit may require professional repair or replacement. Persistent issues like refrigerant leaks, electrical faults, or excessive rust are best left to HVAC experts.
Seasonal Storage And Off-Season Care
For those storing their window AC unit during winter, clean and dry all components before removing the unit from the window. Store in a covered, dry place away from extreme temperatures. Cover the unit to prevent dust accumulation and rodent entry.
Energy-Saving Tips For Efficient Operation
- Draw blinds or curtains during peak sun hours to reduce heat load.
- Set the thermostat to 78-80°F for energy savings when home, and raise it when away.
- Use the fan-only setting during mild weather to circulate air with minimal energy use.
- Seal any gaps or leaks around the window frame to boost efficiency.
Following these best practices keeps your window AC unit running economically and reliably all season long.
Tips for Getting the Best HVAC Prices
- Prioritize Quality Over Cost
The most critical factor in any HVAC project is the quality of the installation. Don’t compromise on contractor expertise just to save money. - Check for Rebates
Always research current rebates and incentives — they can significantly reduce your overall cost. - Compare Multiple Quotes
Request at least three estimates before making your choice. You can click here to get three free quotes from local professionals. These quotes include available rebates and tax credits and automatically exclude unqualified contractors. - Negotiate Smartly
Once you've chosen a contractor, use the proven strategies from our guide — How Homeowners Can Negotiate with HVAC Dealers — to get the best possible final price.