Water filter indicator lights are essential components of many modern water filtration systems, letting you know when it’s time to replace your filter. After installing a new filter, resetting this light is a crucial step that’s often overlooked. The reset process varies by appliance brand and model, but typically involves pressing specific button combinations or following a sequence of steps outlined in your user manual. Understanding how to properly reset your water filter light ensures your indicator system works correctly and provides accurate information about when the next replacement is due.
A water filter light, also known as a filter indicator or status light, is a feature built into appliances with water filtration systems. This light serves as a visual reminder that tracks the lifespan of your water filter. Typically displaying green, yellow, or red colors (or sometimes blue when new), the light changes as the filter ages.
Most water filter lights work on a timer system rather than actually testing water quality. They’re programmed to change color or start blinking after a predetermined period—usually around 6 months or after filtering a specific volume of water. This timeframe is based on the manufacturer’s estimation of when filter efficiency begins to decline.
The primary purpose of these indicator lights is to ensure you don’t continue using an ineffective filter that could allow contaminants to pass through or restrict water flow due to clogging.
Content Navigation
Why You Need To Reset The Water Filter Light
Resetting your water filter light after replacing the filter is crucial for several important reasons. First and foremost, it ensures accurate tracking of your new filter’s lifespan. Without resetting, the indicator would continue showing information for the old filter, potentially causing you to replace a perfectly good filter prematurely.
Additionally, some advanced appliances may reduce water flow or trigger warning messages if they detect an “expired” filter, even if you’ve physically replaced it. These systems rely on the reset action to recognize that maintenance has been performed.
Call 888-896-7031 for Free Local HVAC Quotes – Compare and Save Today!
From a practical standpoint, ignoring a constantly blinking or red filter light can lead to “alert fatigue,” where you become accustomed to ignoring warning lights. This habit might cause you to miss actual important alerts in the future.
General Steps To Reset Water Filter Lights
While specific reset procedures vary between manufacturers and models, most water filter lights follow similar reset principles. Here’s a generalized approach:
- Replace the water filter according to manufacturer instructions
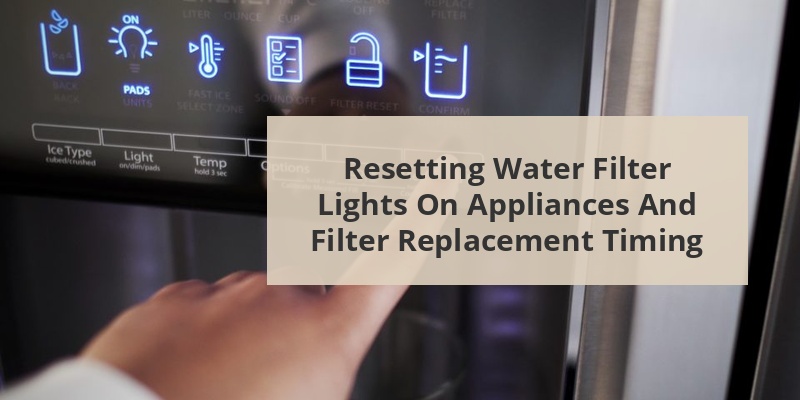
- Locate the filter reset button or combination (often labeled “Filter Reset” or with a filter icon)
- Press and hold the reset button/combination for 3-5 seconds until you see a change in the indicator light
- Verify the reset was successful by checking that the light has changed color or stopped blinking
- Run 2-4 gallons of water through the new filter to flush it (as recommended by most manufacturers)
Always check your specific appliance manual for the exact procedure, as some models require different button combinations or have digital menu systems rather than physical buttons for resetting the filter indicator.
Resetting Water Filter Lights On Different Appliances
Refrigerator Brands
Different refrigerator brands have specific procedures for resetting their water filter indicators. Here’s how to reset some popular brands:
| Brand | Reset Method |
|---|---|
| Whirlpool | Press and hold the “Water Filter” button for 3 seconds until the light changes from red to off or blue |
| Samsung | Press and hold “Alarm” or “Water Filter” button for 3-5 seconds, or for newer models, press “Filter Reset” for 3 seconds |
| LG | Press and hold the “Water Filter” button for 3 seconds, or on some models, press and hold “Light” and “Water” simultaneously for 5 seconds |
| GE | Press and hold “Reset Filter” button for 3 seconds or press the “Settings” button to access filter reset in the digital menu |
| KitchenAid | Press and hold “Filter Reset” or “Water Filter” button for 3 seconds until indicator light changes |
Water Dispensers and Filtration Systems
Standalone water dispensers and filtration systems also have indicator lights that need resetting:
- Brita dispensers: Most models have a reset button near the filter indicator or require pressing a combination of buttons as shown in the user manual
- PUR systems: Usually require pressing and holding the status button for 5 seconds until the light flashes or changes color
- Culligan systems: Often have a reset button located on the filter housing or require accessing a digital menu to reset the timer
- Under-sink systems: Typically have a small reset button on the electronic module or require disconnecting power briefly
Smart Water Filtration Systems
Modern smart filtration systems often have app-based reset procedures:
Call 888-896-7031 for Free Local HVAC Quotes – Compare and Save Today!
Connect to your system via the manufacturer’s app and navigate to filter settings. The app usually provides step-by-step instructions for confirming filter replacement and resetting the timer. Some systems, like those from GE and Samsung, can automatically detect new filters and reset themselves when genuine brand filters with RFID chips are installed.
Troubleshooting Common Reset Issues
Sometimes the reset procedure doesn’t work as expected. Here are common issues and solutions:
Light Won’t Reset After Following Instructions
If the indicator light remains unchanged after attempting to reset it, try these steps:
- Power cycle the appliance by unplugging it for 5 minutes, then plug it back in
- Check if you need to run water through the system before the reset takes effect
- Ensure you’re pressing the correct button(s) with sufficient pressure for the required duration
- Verify you’ve properly installed the new filter – some systems won’t reset with improperly seated filters
- For digital systems, check if there’s a software update available
Light Resets But Quickly Returns to Red
If the light initially resets but quickly reverts to indicating a replacement is needed:
- Confirm you’re using a compatible filter – some systems detect non-OEM filters
- Check for water leaks which might trigger early warnings
- Inspect for error codes that might indicate a system malfunction rather than filter issues
- Some smart systems require registering the new filter’s serial number in an app
Tips For Maintaining Your Water Filtration System
Beyond just resetting the filter light, proper maintenance ensures optimal filtration performance:
- Keep track of actual installation dates independent of the indicator light – write the date on the filter with a permanent marker
- Consider water usage patterns – heavy usage households might need more frequent replacements than the default timer suggests
- Flush all new filters thoroughly according to manufacturer recommendations before regular use
- For refrigerator filters, clean the filter housing area periodically to prevent buildup of debris
- Consider water quality – homes with particularly hard or contaminated water may require more frequent filter changes
When To Replace Filters Regardless Of Indicator Light
While indicator lights are helpful, there are times when you should replace your filter even if the light hasn’t changed:
- When you notice a significant change in water taste or odor
- If water flow becomes noticeably reduced (indicating possible clogging)
- After long periods of non-use (vacation homes or seasonal properties)
- Following municipal water advisories or contamination alerts
- If it’s been more than a year since replacement, regardless of light status
Remember that filter indicator lights provide general guidelines rather than precise measurements of filter effectiveness. Using your judgment based on water quality and system performance is equally important for maintaining healthy, clean water.
Tips for Getting the Best HVAC Prices
- Prioritize Quality Over Cost
The most critical factor in any HVAC project is the quality of the installation. Don’t compromise on contractor expertise just to save money. - Check for Rebates
Always research current rebates and incentives — they can significantly reduce your overall cost. - Compare Multiple Quotes
Request at least three estimates before making your choice. You can click here to get three free quotes from local professionals. These quotes include available rebates and tax credits and automatically exclude unqualified contractors. - Negotiate Smartly
Once you've chosen a contractor, use the proven strategies from our guide — How Homeowners Can Negotiate with HVAC Dealers — to get the best possible final price.