Properly attaching manifold gauges to an AC unit is essential for diagnosing system pressure and ensuring efficient operation. This guide explains how to safely and effectively hook up gauges to your air conditioning system, highlighting each step for both beginners and experienced HVAC technicians. The instructions cover tools, safety, connection processes, and troubleshooting tips to help you achieve accurate readings and maintain your AC unit’s performance.
Content Navigation
- Essential Tools And Materials Needed
- Safety Precautions Before Hooking Up AC Gauges
- Understanding Manifold Gauge Set Components
- Identifying AC Unit Service Ports
- Step-By-Step: How To Connect Gauges To An AC Unit
- Typical AC System Pressure Readings (At 75°F Outdoor Temperature)
- Common Mistakes To Avoid When Using AC Gauges
- When To Use The Yellow Hose: Charging, Recovery, Or Evacuation
- Tips For Accurate AC Pressure Readings
- How To Disconnect Gauges Safely
- Understanding Refrigerant Types And Gauge Compatibility
- Digital Vs. Analog Manifold Gauges
- Troubleshooting AC Units With Manifold Gauges
- Gauge Calibration And Maintenance
- Best Practices For Professional HVAC Technicians
- Frequently Asked Questions About Connecting Gauges To AC Units
- Environmental And Legal Considerations
- Final Tips For Homeowners
Essential Tools And Materials Needed
Before starting, gathering the right tools is crucial for safety and accuracy. Using the proper equipment not only safeguards your AC unit but also ensures precise measurements of system pressures.
- Manifold Gauge Set: Includes high-pressure (red), low-pressure (blue), and sometimes a yellow service hose.
- Protective Gear: Safety goggles and gloves to prevent refrigerant burns or exposure.
- Refrigerant Identifier: Optional, for ensuring correct refrigerant type handling.
- Vacuum Pump: Needed for certain service operations, like evacuation.
- Thermometer: Used for accurate temperature readings at service ports.
- Screwdrivers/Wrenches: For removing access panels and securing connections.
Safety Precautions Before Hooking Up AC Gauges
Prioritizing safety is non-negotiable when working with refrigerants and pressurized systems. Mishandling can lead to injury or environmental damage, so always adopt best practices before connecting AC gauges.
- Ensure the AC unit is powered off before connecting or disconnecting gauges.
- Wear protective gloves and goggles at all times.
- Work in a well-ventilated area to prevent refrigerant accumulation.
- Double-check that the gauge hoses and connections are not damaged or leaking.
- Keep flammable materials away from the workspace.
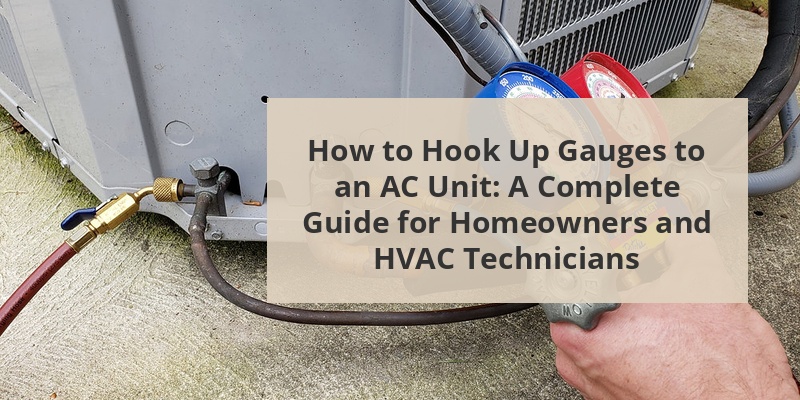
Understanding Manifold Gauge Set Components
A manifold gauge set typically consists of three hoses (blue, red, and yellow) and two or three gauges, each serving a specific purpose. Understanding their roles helps prevent errors and equipment damage during the connection process.
| Color | Function | Connected To |
|---|---|---|
| Blue | Low-pressure side | Suction line/service port (large pipe) |
| Red | High-pressure side | Discharge line/service port (small pipe) |
| Yellow | Service/Charging | Vacuum pump, recovery machine, or canister |
Note: Some modern AC systems may use port sizes, colors, or quick-connect adapters unique to their refrigerant type (such as R-410a or R-22).
Identifying AC Unit Service Ports
Locate the suction (low-pressure) and discharge (high-pressure) service ports on your AC unit. This step ensures you attach the correct gauge hoses to the right ports and prevents confusion or error in readings.
Call 888-896-7031 for Free Local HVAC Quotes – Compare and Save Today!
- The suction line is typically the larger, insulated copper tube.
- The discharge line (liquid line) is usually smaller and uninsulated.
- Service valves are often protected by screw caps or valve covers – remove these before attaching the hoses.
- Refer to your unit’s manual if ports are not clearly marked.
Step-By-Step: How To Connect Gauges To An AC Unit
Step 1: Inspect Hoses And Connections
Check for cracks, kinks, or leaks in all manifold gauge hoses and make sure O-rings are intact. Faulty hoses can affect accuracy or result in refrigerant leaks.
Step 2: Secure The High And Low-Pressure Gauges
With the AC unit powered off, connect the blue hose to the low-pressure port on the larger suction line. Next, connect the red hose to the high-pressure port on the smaller discharge line. Ensure connections are tight but not over-torqued to prevent damage.
Step 3: Attach The Yellow Service Hose (If Needed)
Connect the yellow hose to your intended service device, like a refrigerant canister, recovery tank, or vacuum pump. This hose is not always necessary for just reading system pressures, but is essential for adding/removing refrigerant or evacuating the system.
Step 4: Power On The AC Unit
Once hoses are securely connected, restore power to the AC unit to allow pressures to stabilize. System pressures should read correctly within a few minutes of operation; avoid making readings immediately after turning on.
Step 5: Open Manifold Valves Carefully
Only turn the manifold valves as required for your task. For most pressure readings, leave the manifold valves closed and only open them when charging or evacuating the system. Overuse of valves is unnecessary and can risk refrigerant loss.
Step 6: Take Your Pressure Readings
Record the low and high-side pressures as indicated on the blue and red gauges. Compare these readings with manufacturer-recommended specifications to diagnose potential issues within the AC system.
Call 888-896-7031 for Free Local HVAC Quotes – Compare and Save Today!
Typical AC System Pressure Readings (At 75°F Outdoor Temperature)
| Refrigerant | Low Side (Suction) PSI | High Side (Discharge) PSI |
|---|---|---|
| R-22 | 60–70 PSI | 250–270 PSI |
| R-410a | 120–145 PSI | 360–410 PSI |
These values are approximate and should be verified against the AC unit’s service label or technical manual.
Common Mistakes To Avoid When Using AC Gauges
Even seasoned technicians can make errors that compromise the reliability of pressure readings or the safety of the procedure. Being aware of these pitfalls helps maintain both equipment integrity and user safety.
- Connecting hoses to the wrong ports (high vs low side).
- Using damaged or incompatible hoses and fittings.
- Leaving manifold valves open unnecessarily, risking refrigerant loss.
- Not using proper personal protective equipment (PPE).
- Failing to purge air from hoses before charging the system.
- Recording readings immediately after system start-up, rather than waiting for stabilization.
When To Use The Yellow Hose: Charging, Recovery, Or Evacuation
The yellow service hose is primarily used during specific maintenance procedures:
- Charging: Introducing the correct amount and type of refrigerant into the system.
- Recovery: Safely removing refrigerant during repairs or system replacement.
- Evacuation: Drawing a vacuum to remove air and moisture from the system before recharging.
Always connect the yellow hose to a refrigerant source or vacuum pump as per the maintenance task required.
Tips For Accurate AC Pressure Readings
Several factors influence the accuracy of pressure readings when using AC manifold gauges. Control these variables for the best results:
- Check ambient temperature, as pressure varies with environmental conditions.
- Wait at least 5–10 minutes after system start-up before measuring.
- Ensure the system is not in “defrost” mode if servicing a heat pump AC.
- Clean or replace filters to avoid airflow restrictions affecting readings.
- Use manufacturer’s pressure-temperature charts for the specific refrigerant in your system.
How To Disconnect Gauges Safely
After obtaining accurate readings or completing service, follow these steps to disconnect without releasing refrigerant or causing injury:
- Turn off the AC unit and wait for system pressures to equalize (a few minutes is usually sufficient).
- Close all manifold gauge valves.
- Slowly remove each hose from its corresponding service port, being mindful of any pressure still present.
- Replace all service valve caps to prevent leaks or contamination.
Properly disconnecting ensures longevity of your tools and prevents environmental harm.
Understanding Refrigerant Types And Gauge Compatibility
Different AC systems use different refrigerant types, most commonly R-22 and R-410a. Using the correct gauge set for your refrigerant ensures the safety and precision of your readings.
- R-22 gauges: Designed for lower pressure systems (often with 1/4″ connections).
- R-410a gauges: Rated for higher pressures (often with 5/16″ connections and pink/purple markings).
- Using an incompatible manifold set can cause inaccurate readings or equipment damage.
Digital Vs. Analog Manifold Gauges
Technological advances have introduced digital manifold gauges, offering increased precision and data recording functions. Here’s a comparison between analog and digital gauges:
| Feature | Analog Gauges | Digital Gauges |
|---|---|---|
| Accuracy | Good, but subject to parallax error | Highly precise, easy to read |
| Durability | Less sensitive to drops/impacts | May be prone to water/electrical damage |
| Functionality | Basic pressure reading | Can include temperature/capacity data and record logs |
| Cost | Generally lower | Higher initial investment, but saves time |
Troubleshooting AC Units With Manifold Gauges
Manifold gauges are powerful diagnostic tools for identifying common AC system issues such as low refrigerant, compressor failures, or blockages. Here’s how you can interpret readings:
- Low pressure on both sides: Indicates possible low refrigerant charge or suction restrictions.
- High low-side pressure, low high-side pressure: May point to a faulty compressor or reversed valves.
- Excessively high pressures: Suggests overcharging, blocked condenser, or high ambient temperatures.
- Low low-side pressure only: Could be caused by a restricted expansion valve or filter drier.
Gauge Calibration And Maintenance
Regular calibration and maintenance of manifold gauge sets is essential to ensure long-term accuracy and safety. Neglecting these tasks can result in diagnostic errors or dangerous failures.
- Calibrate gauges annually or as recommended by the manufacturer.
- Inspect hoses, gaskets, and connections for leaks after each use.
- Rinse and dry manifold set after exposure to moisture or chemical spills.
- Store manifold gauge sets in protective cases to prevent damage.
Best Practices For Professional HVAC Technicians
Professional HVAC technicians must follow additional protocols to ensure code compliance and client satisfaction. These advanced tips improve safety and efficiency on every service call.
- Carry multiple manifold sets for different refrigerant types (R-22, R-410a, R-134a).
- Use a refrigerant identifier before recharging unknown systems.
- Keep detailed service logs for each AC unit, including pressure readings and refrigerant weights added/removed.
- Follow all EPA regulations for refrigerant handling and recovery.
- Communicate findings clearly to homeowners, explaining what pressure readings mean regarding system health.
Frequently Asked Questions About Connecting Gauges To AC Units
- Can I hook up gauges while the AC is running?
Yes, but always connect hoses first while the AC is off, then power on the unit for readings. - What if my readings are far outside normal ranges?
Double-check hose connections and the manifold set compatibility; if still off, your system may need professional service. - Do I need digital or analog gauges?
Either works for most homeowners; digital offers more features, while analog is often more affordable and durable.
Environmental And Legal Considerations
Handling refrigerants is strictly regulated by the Environmental Protection Agency (EPA). Only certified technicians can legally service AC systems that involve refrigerant recovery or charging.
- Never vent refrigerants into the atmosphere.
- Always recover and recycle refrigerant using approved machines.
- Log refrigerant use and disposal as required by local and federal law.
Following these guidelines helps protect the environment and keeps you compliant with U.S. regulations.
Final Tips For Homeowners
While hooking up gauges to an AC unit can seem straightforward, improper practice can be dangerous and may void warranties. If unsure, consult with a certified HVAC technician or seek professional service for complex diagnostics or repairs.
Tips for Getting the Best HVAC Prices
- Prioritize Quality Over Cost
The most critical factor in any HVAC project is the quality of the installation. Don’t compromise on contractor expertise just to save money. - Check for Rebates
Always research current rebates and incentives — they can significantly reduce your overall cost. - Compare Multiple Quotes
Request at least three estimates before making your choice. You can click here to get three free quotes from local professionals. These quotes include available rebates and tax credits and automatically exclude unqualified contractors. - Negotiate Smartly
Once you've chosen a contractor, use the proven strategies from our guide — How Homeowners Can Negotiate with HVAC Dealers — to get the best possible final price.
- Always use manufacturer-approved tools and follow unit-specific instructions.
- If refrigerant levels are low, address leaks before recharging.
- Only attempt DIY work if you are confident in your technical skills and local code compliance.