
Water filter cartridges are essential components of home water filtration systems that remove contaminants and impurities from your drinking water. Over time, these cartridges collect particles, sediment, and chemicals, becoming less effective and requiring replacement. Regular cartridge replacement ensures your system continues to provide clean, great-tasting water while protecting your family from potential contaminants. This guide covers everything you need to know about water filter cartridges, including when and how to replace them, different types available, and maintenance tips to maximize their effectiveness.
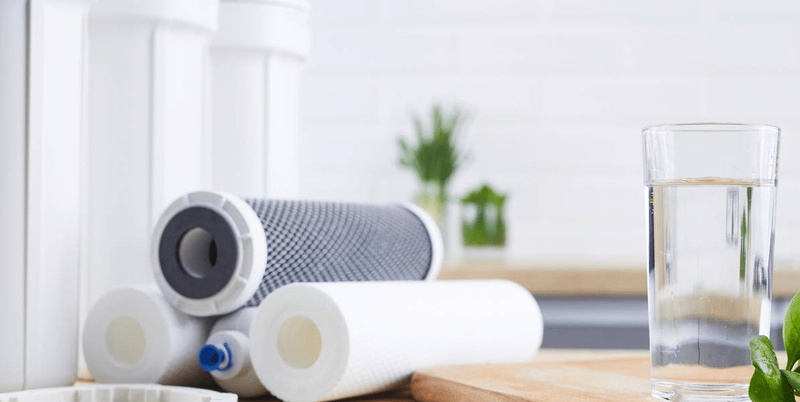
Water filter cartridges are the workhorses of any filtration system, containing specialized media designed to trap or neutralize specific contaminants as water passes through. These replaceable components come in various shapes, sizes, and filtration technologies to address different water quality issues.
Cartridges typically use one or more of these filtration methods:
- Activated carbon filters that reduce chlorine, volatile organic compounds (VOCs), and improve taste and odor
- Sediment filters that remove dirt, rust, and particulate matter
- Ion exchange media that soften water by removing minerals like calcium and magnesium
- Reverse osmosis membranes that filter out dissolved solids and contaminants
- Ceramic filters that block bacteria and parasites
Most residential systems use either standard-sized cartridges (10-inch being most common) or proprietary cartridges designed specifically for certain brands and models. Understanding your specific filter type is crucial for effective replacement.
Content Navigation
Signs It’s Time to Replace Your Filter Cartridge
Knowing when to replace your filter cartridge is essential for maintaining water quality. Here are the most common indicators that it’s time for a replacement:
- Reduced water flow or pressure from your filtered tap
- Noticeable change in water taste, odor, or clarity
- Visible sediment or particles in your filtered water
- It’s been 3-6 months since your last replacement (for most standard filters)
- Filter indicator light is on (if your system has one)
- Water filter gauge shows high pressure differential
Different cartridge types have varying lifespans. While manufacturers typically provide recommended replacement schedules, actual replacement frequency depends on your water quality and usage. Households with poor water quality or high water consumption may need more frequent replacements.
Call 888-896-7031 for Free Local HVAC Quotes – Compare and Save Today!
Types of Water Filter Cartridges
| Cartridge Type | What It Removes | Typical Lifespan | Price Range |
|---|---|---|---|
| Sediment | Sand, dirt, rust, debris | 3-6 months | $10-$30 |
| Carbon Block | Chlorine, VOCs, pesticides, bad taste/odor | 6-12 months | $15-$50 |
| Granular Activated Carbon | Chlorine, bad taste/odor, some chemicals | 2-6 months | $10-$40 |
| Reverse Osmosis Membrane | Dissolved solids, heavy metals, most contaminants | 2-3 years | $75-$200 |
| Ceramic | Bacteria, cysts, sediment | 6-12 months | $25-$120 |
| KDF (Kinetic Degradation Fluxion) | Heavy metals, chlorine, algae, fungi | 6-12 months | $25-$60 |
When selecting replacement cartridges, compatibility with your existing system is paramount. Always check your filter system’s manual or manufacturer’s website to ensure you purchase the correct replacement cartridge size and type.
Step-by-Step Replacement Guide
Replacing a water filter cartridge is typically straightforward, though specific steps may vary by system type. Here’s a general guide that works for most standard systems:
Preparation
- Gather supplies: new filter cartridge, bucket, towels, and possibly a filter wrench
- Turn off the water supply to your filter system
- Release pressure by turning on the filtered water tap until water stops flowing
- Place a bucket or towels beneath the filter housing to catch any water spillage
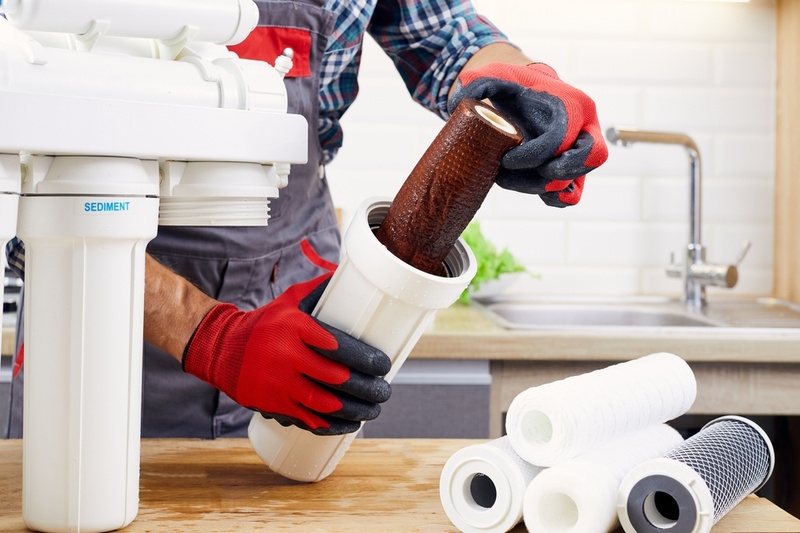
Removing the Old Cartridge
- Unscrew the filter housing (turn counterclockwise) using hands or a filter wrench if tight
- Remove the old cartridge from the housing and discard properly
- Note the orientation of the old cartridge for proper installation of the new one
- Clean the inside of the housing with mild soap and water if necessary
Installing the New Cartridge
- Remove any packaging from the new cartridge
- Check for a pre-soak requirement (some carbon filters need pre-soaking)
- Insert the new cartridge into the housing in the same orientation as the old one
- Ensure any gaskets or O-rings are clean and properly seated
- Apply a small amount of food-grade silicone lubricant to O-rings if needed
- Hand-tighten the housing back onto the system (clockwise) – avoid over-tightening
System Restart
- Slowly turn the water supply back on
- Check for leaks around the housing
- Flush the system by running water through it for 5-10 minutes or as recommended by the manufacturer
- Reset any filter change indicators or timers on your system
Troubleshooting Common Issues
Even with careful installation, problems can occasionally arise. Here are solutions to common issues:
- Leaking filter housing: Check that O-rings are clean, undamaged, and properly seated. Ensure the housing is tight enough but not over-tightened.
- Low water pressure after replacement: Ensure the cartridge is properly aligned and that air is fully purged from the system. Check for kinked supply lines.
- Unusual taste after replacement: Some new carbon filters release carbon dust initially. Extended flushing (15-20 minutes) usually resolves this issue.
- Difficult to remove housing: Use a filter wrench, available at most hardware stores. For stubborn housings, try tapping gently around the edge with a rubber mallet.
Maintenance Tips to Extend Cartridge Life
While regular replacement is inevitable, these practices can help maximize your filter cartridge’s effective lifespan:
- Install a pre-filter or sediment filter upstream from specialty filters to catch larger particles first
- Follow manufacturer-recommended flow rates and don’t exceed pressure ratings
- For whole-house systems, replace pre-filters more frequently to protect more expensive downstream filters
- Keep replacement cartridges in their original sealed packaging until ready to use
- Store spare cartridges in a cool, dry place away from chemicals and solvents
- Consider water quality testing to develop an optimal replacement schedule for your specific conditions
Environmental Considerations
Used water filter cartridges present environmental challenges as they often contain trapped contaminants and are made from multiple materials that are difficult to separate. Consider these more sustainable approaches:
- Look for recyclable cartridge options offered by some manufacturers
- Participate in manufacturer take-back programs (offered by Brita, PUR, and others)
- Consider cartridges with biodegradable components when available
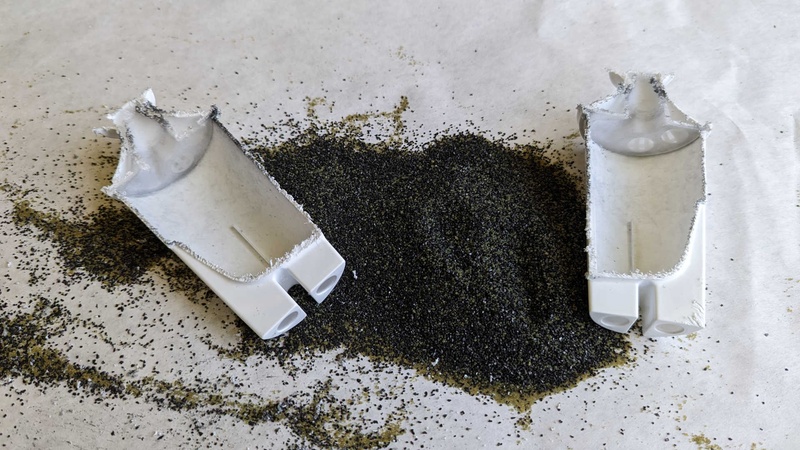
- For carbon filters, spent carbon can sometimes be added to compost (if it only filtered municipal water)
- Choose systems with longer-lasting cartridges to reduce overall waste
By properly maintaining and replacing your water filter cartridges, you ensure continuous access to clean, safe drinking water while protecting your filtration system investment. Regular replacement according to manufacturer guidelines remains the single most important maintenance task for any water filtration system.
Call 888-896-7031 for Free Local HVAC Quotes – Compare and Save Today!
Tips for Getting the Best HVAC Prices
- Prioritize Quality Over Cost
The most critical factor in any HVAC project is the quality of the installation. Don’t compromise on contractor expertise just to save money. - Check for Rebates
Always research current rebates and incentives — they can significantly reduce your overall cost. - Compare Multiple Quotes
Request at least three estimates before making your choice. You can click here to get three free quotes from local professionals. These quotes include available rebates and tax credits and automatically exclude unqualified contractors. - Negotiate Smartly
Once you've chosen a contractor, use the proven strategies from our guide — How Homeowners Can Negotiate with HVAC Dealers — to get the best possible final price.