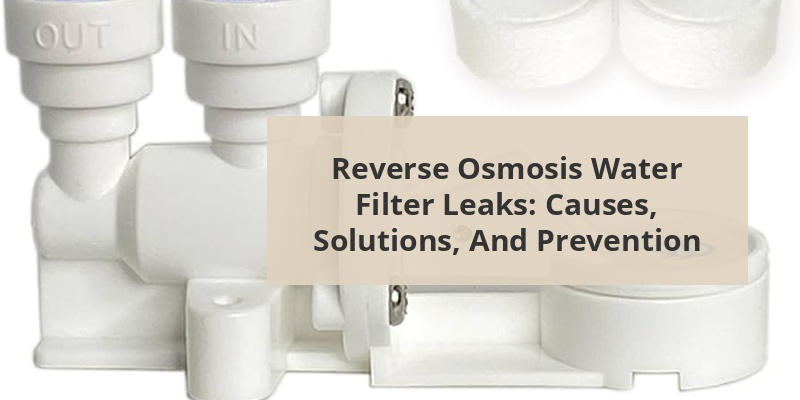
Reverse osmosis (RO) water filtration systems provide clean, purified drinking water by removing contaminants through a semi-permeable membrane. Despite their effectiveness, these systems can sometimes develop leaks that not only waste water but may potentially cause property damage. When a reverse osmosis filter leaks, it’s important to identify the source quickly and implement appropriate fixes. Leaks commonly occur at connections, filter housings, storage tanks, or drain lines, and can result from various factors including installation errors, worn components, or pressure problems.
Understanding why your RO system is leaking helps in addressing the problem effectively. Most leaks stem from a handful of common issues that homeowners can identify with careful inspection. Recognizing these causes can help you troubleshoot more efficiently and potentially avoid costly repairs or replacements.
Content Navigation
Loose Connections and Fittings
The most frequent cause of leaks in reverse osmosis systems is loose connections. Push-connect fittings, threaded connections, and tube inserts can all work loose over time due to water pressure fluctuations or natural vibrations. Improperly cut tubing or tubing that wasn’t fully inserted during installation can also lead to slow drips or sudden leaks.
Damaged O-rings and Seals
O-rings and seals create watertight connections between components. Over time, these rubber parts can become brittle, cracked, or compressed, losing their ability to create a proper seal. Filter housing O-rings are particularly susceptible to wear since they’re disturbed each time you change a filter, potentially leading to leaks around the housing canisters.
Cracked Filter Housings
Filter housings (the canisters that hold filter cartridges) can develop cracks due to age, pressure fluctuations, overtightening during filter changes, or even manufacturing defects. A cracked housing will typically leak continuously regardless of whether the system is producing water or in standby mode.
Pressure Problems
Reverse osmosis systems operate within specific pressure parameters. Excessive incoming water pressure can stress components and connections, while insufficient pressure may cause improper operation of the automatic shut-off valve, leading to continuous flow and potential leaking at the drain connection.
Identifying the Source of the Leak

Before attempting repairs, you need to locate exactly where the leak is occurring. This detective work can save time and ensure you address the actual problem rather than replacing unnecessary parts.
Visual Inspection Technique
Start by drying all visible components with paper towels or a clean cloth. Then observe the system over several minutes during both active filtration and standby modes. Sometimes leaks only manifest during specific parts of the filtration cycle. Use a flashlight to examine connections, housings, and the tank from multiple angles.
Call 888-896-7031 for Free Local HVAC Quotes – Compare and Save Today!
Common Leak Locations
- Filter housing connections – where canisters connect to the system head
- Push-connect fittings – where tubing enters quick-connect fittings
- Tank valve – where the storage tank connects to the system
- Drain saddle – where waste water flows to the drain pipe
- Faucet connections – underneath the sink where tubing connects to the faucet
- Pressure relief valve – often located on the storage tank
Step-by-Step Troubleshooting Guide

Follow this systematic approach to locate and fix your reverse osmosis leak. Always start by turning off the water supply to your system before beginning any inspection or repair work to prevent water damage.
Checking Filter Housings
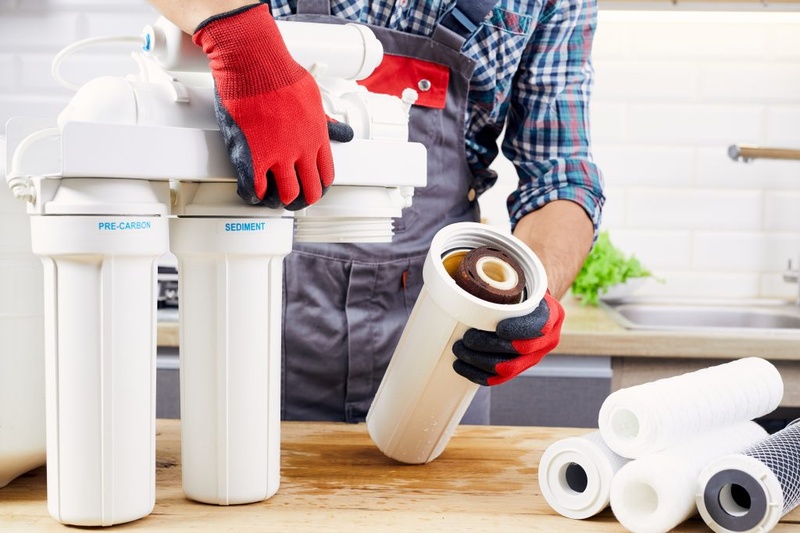
Inspect each filter housing carefully. Unscrew housings one at a time, check the O-rings for cracks or deformation, and examine the housing threads and bases for damage. Ensure housings are properly tightened but avoid overtightening which can crack the housing or damage O-rings. Apply food-grade silicone lubricant to O-rings if they appear dry.
Testing Tubing Connections
Examine all tubing connections by gently tugging on each tube to ensure it’s securely seated in its fitting. Look for cuts, kinks, or deformations in the tubing that might compromise the seal. For push-connect fittings, press the collet (the small ring around the tube) while gently pulling the tube to test security. Re-cut tubing ends squarely if they appear damaged.
Inspecting the Storage Tank
Check the tank valve and connection point. A leaking tank may indicate a failing internal bladder or damaged valve. Examine the air valve on top of the tank and test the tank’s air pressure when empty (should be 7-10 psi). Replace any components showing signs of damage or corrosion.
How to Fix Common Reverse Osmosis Leaks
Once you’ve identified the source of your leak, you can proceed with appropriate repairs. Many fixes are straightforward DIY projects requiring minimal tools.
Repairing Leaking Connections
For threaded connections, apply 2-3 wraps of Teflon tape in a clockwise direction before reconnecting. Never use plumber’s pipe dope or non-food-grade sealants on drinking water systems. For push-connect fittings, disconnect the tubing, cut off 1/4 inch to create a fresh end, and reinsert firmly until you feel it seat completely.
Call 888-896-7031 for Free Local HVAC Quotes – Compare and Save Today!
Replacing O-rings and Seals
Replace any damaged O-rings with exact replacements from your system manufacturer. Generic O-rings may not provide a proper seal. When installing new O-rings, lightly lubricate them with food-grade silicone lubricant and ensure they sit properly in their grooves without twisting or pinching.
Addressing Tank and Valve Leaks
If the tank valve is leaking, try tightening it first. If leaking persists, replace the entire valve assembly. For leaks from the tank body itself, replacement is usually necessary as repairs are generally not effective. When installing a new tank, apply Teflon tape to the threads and hand-tighten only.
| Leak Location | Possible Causes | Recommended Fix | Estimated Cost |
|---|---|---|---|
| Filter Housing | Worn O-ring, cracked housing | Replace O-ring or housing | $5-$35 |
| Tubing Connections | Loose fitting, damaged tubing | Recut tubing, replace fitting | $3-$10 |
| Storage Tank | Faulty valve, tank failure | Replace valve or tank | $35-$100 |
| Drain Saddle | Poor installation, loosening | Reposition, tighten, or replace | $10-$15 |
| Faucet Connection | Loose compression fitting | Tighten or replace fitting | $5-$20 |
When to Call a Professional
While many reverse osmosis leaks can be addressed by homeowners, some situations warrant professional assistance. Complex issues, recurrent leaks, or system-wide failures may indicate deeper problems that require specialized knowledge or tools.
Signs You Need Professional Help
- Multiple leak points suggesting systemic failure
- Leaks that recur despite repeated DIY repairs
- Electrical components near the leak that create safety hazards
- Systems under warranty where DIY repairs might void coverage
- Water damage to cabinetry or flooring requiring remediation
Preventive Maintenance to Avoid Future Leaks
Regular maintenance can significantly reduce the likelihood of leaks in your reverse osmosis system. Establishing a consistent inspection and replacement schedule helps identify potential issues before they cause leaks or system failure.
Regular Maintenance Schedule
| Component | Maintenance Task | Recommended Frequency |
|---|---|---|
| Pre-filters | Replace sediment and carbon filters | Every 6-12 months |
| RO Membrane | Inspect and replace as needed | Every 2-3 years |
| Post-filter | Replace | Every 12 months |
| O-rings and Seals | Inspect and lubricate | Every filter change |
| Tubing Connections | Check for secure fit | Every 3 months |
| Tank Pressure | Check air pressure (when empty) | Annually |
Proper Filter Replacement Technique
When changing filters, carefully inspect and lubricate O-rings before reinstalling housings. Turn off the water supply and release system pressure before opening any housings. Hand-tighten housings only—using tools can crack housings or damage threads. After reassembly, check for leaks by running the system through several cycles.
DIY vs. Professional Repair Comparison
Deciding whether to tackle reverse osmosis leak repairs yourself or call a professional depends on several factors including your comfort level with plumbing repairs, tool availability, and the complexity of the issue.
| Factor | DIY Repair | Professional Repair |
|---|---|---|
| Average Cost | $5-$100 for parts | $75-$300 including parts and labor |
| Time Investment | 1-3 hours troubleshooting and repair | Usually completed within 1 hour |
| Tools Required | Basic hand tools, possibly tubing cutter | Professional-grade tools provided by technician |
| Warranty Impact | May void warranty on some systems | Preserves warranty coverage |
| Skill Level | Basic plumbing knowledge recommended | Certified technicians with specialized training |
| Success Rate | Variable depending on problem complexity | High success rate with professional diagnosis |
For simple issues like replacing O-rings or tightening connections, DIY repairs offer significant cost savings. However, for complex problems or if you lack confidence in your abilities, a professional can provide peace of mind and long-term solutions.
Tips for Getting the Best HVAC Prices
- Prioritize Quality Over Cost
The most critical factor in any HVAC project is the quality of the installation. Don’t compromise on contractor expertise just to save money. - Check for Rebates
Always research current rebates and incentives — they can significantly reduce your overall cost. - Compare Multiple Quotes
Request at least three estimates before making your choice. You can click here to get three free quotes from local professionals. These quotes include available rebates and tax credits and automatically exclude unqualified contractors. - Negotiate Smartly
Once you've chosen a contractor, use the proven strategies from our guide — How Homeowners Can Negotiate with HVAC Dealers — to get the best possible final price.